
Generate professional reports for your clients featuring key website metrics. Reports help you demonstrate your impact through polished, easy-to-read summaries that keep clients informed and confident in your work.
In this guide, you will learn how to create, send, and manage client site reports.
Create and manage reports from the Reports section in the sidebar of your Automattic for Agencies dashboard.
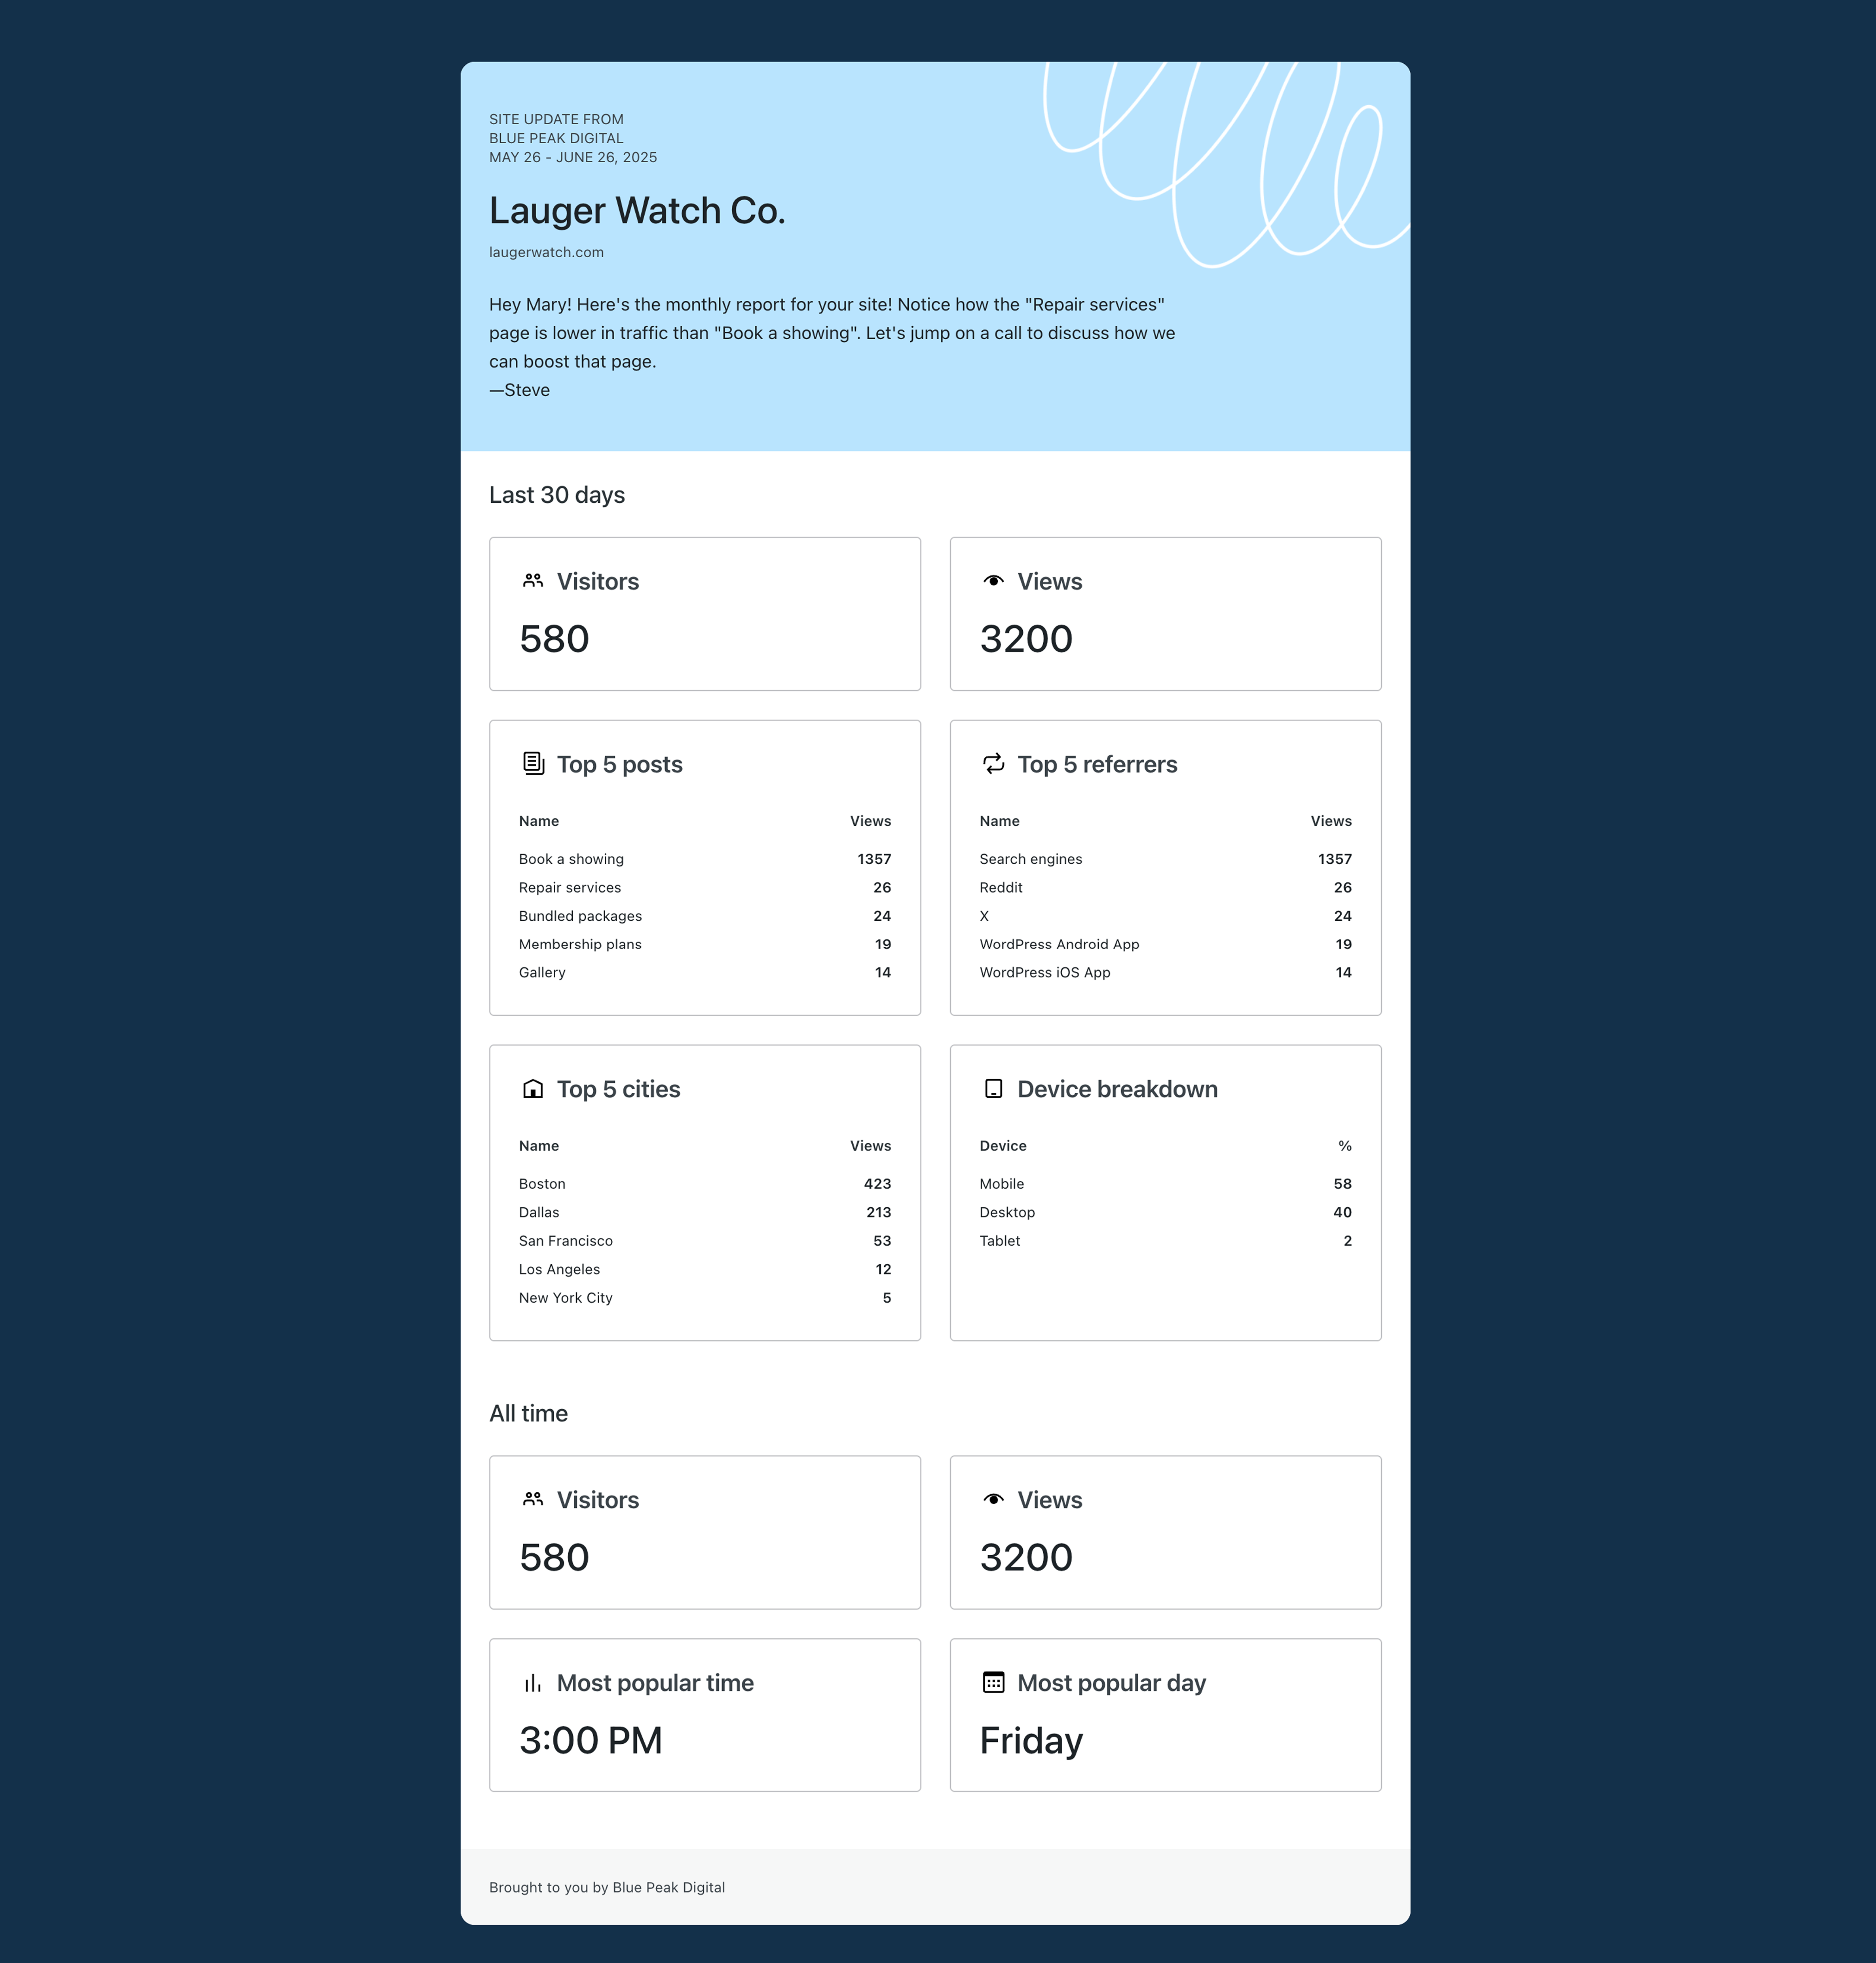
From this page, you can view an example report to preview how the report appears from your client’s perspective.
Navigate to the Automattic for Agencies Dashboard → Reports.
- Click the “Build a new report” button.
- Choose the site you want to report on. If you do not see the site, connect it first using the methods described in Adding existing sites to the Sites Dashboard.
📌
The reporting feature supports only live WordPress.com or Pressable sites with Jetpack.
- Select the report date range. You can also select a custom range.
- Add your client’s email address.
- To send a copy to your agency team members, select the “Also send to your team” checkbox.
- Enter the email addresses of your team members, separated by a comma.

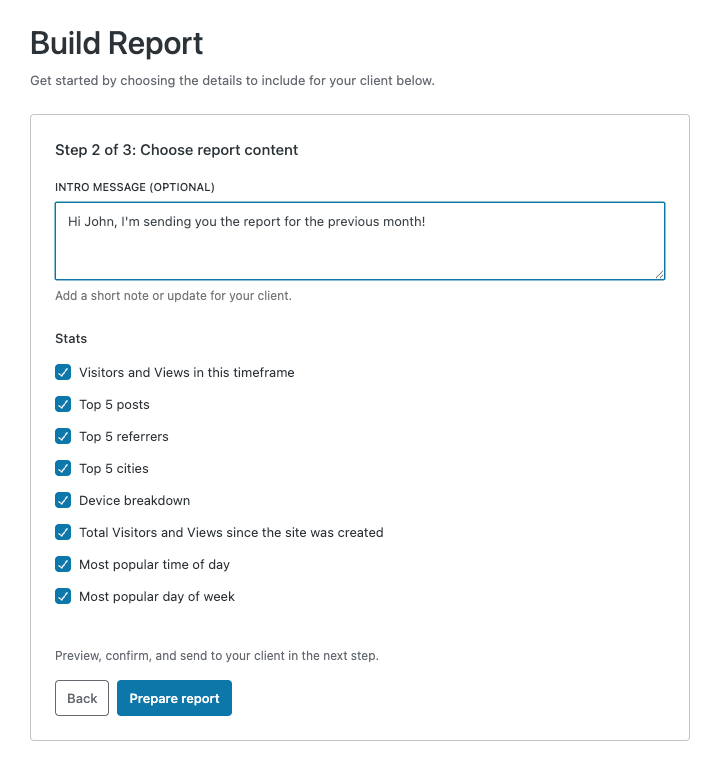
- Enter an optional message for your client.
- Select the data points you want to include under the Stats section by marking the checkboxes.
- Click the “Prepare Report” button to move to the next step.
📌
The report is not sent at this step. You can preview it in Step 3.
A loading screen displays while the system prepares your report. Depending on the volume of data in the date range you selected, this may take a few minutes.

Once your report is ready, you will see the option to send a preview. If you are ready to send the report, click on the “Send to client now” button.

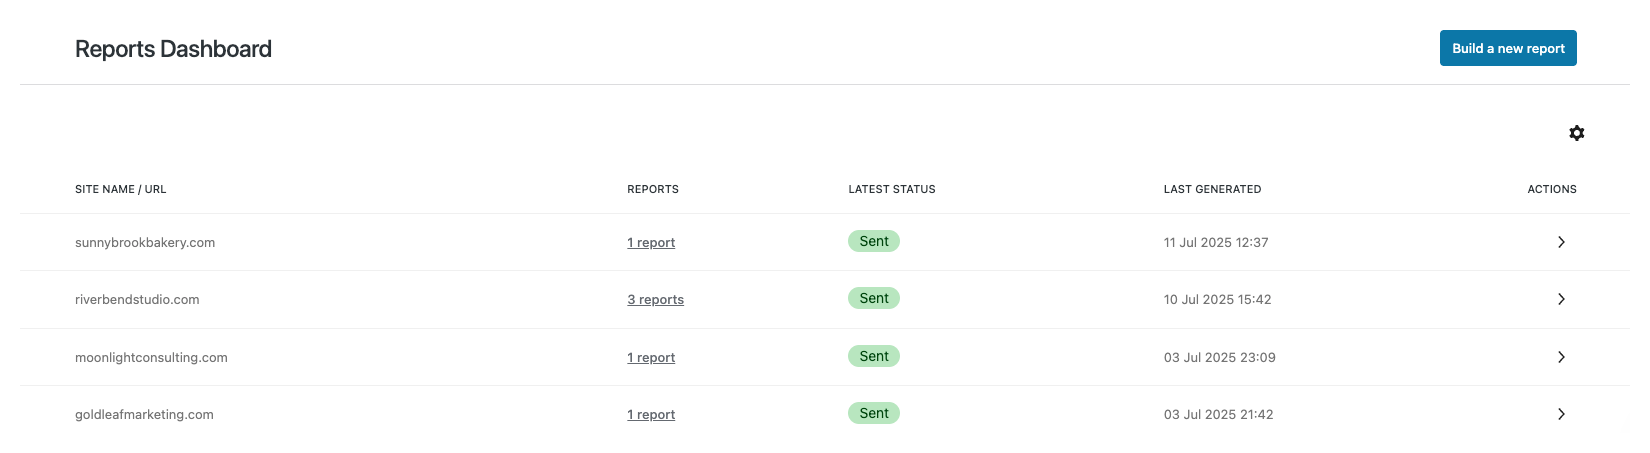
To view all of your created reports, visit the Reports Dashboard. It provides a centralized view of all client reports, organized by site, with the latest reports displayed at the top. Each entry shows:
- Site URL
- Number of reports generated
- Latest report status
- Date of last report generation
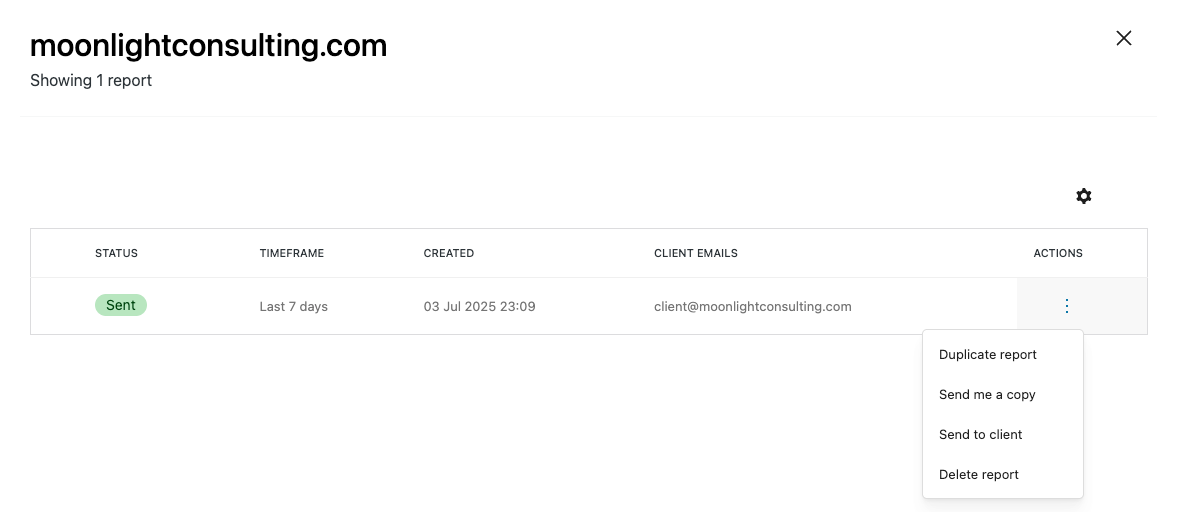
In the detailed view, you can see the complete list of reports sent to the selected site. Each report shows its status, timeframe, creation date, and available actions.
For each report, you can:
- Duplicate Report: Create a report with pre-filled values from an existing report.
- Send Me a Copy: Receive a copy of the report in your email.
- Send to Client: Forward the report to your client’s email address.
- Delete Report: Remove the report after a confirmation dialog.
We continue to improve the reporting feature and the rest of the Automattic for Agencies program. Send your feedback and connect with our team at partnerships@automattic.com.
 Automattic for Agencies - Knowledge Base