In the Automattic for Agencies dashboard, you can invite team members to manage sites, send client referrals, apply to and modify company info for the partner directory, and more.
The account first used to register into Automattic for Agencies will be the `Agency Owner`, while added admins will be referred to as `Team Members.` Team Members have limited access to destructive actions.
You can manage team members from the Team menu on the sidebar.

Go to the Automattic for Agencies Dashboard > Team.
- Click the “Invite a Team Member” button to start the invitation process.
- Enter the team member’s email address or existing WordPress.com username, if applicable. If the Team Member does not have a WordPress.com account, they’ll be prompted to create one.
- Click the “Send Invite” button to send the invitation to the team member. See Accepting an Invitation: A Team Member’s Guide to understand what they will see.

After sending the invite, you will see the team member listed with temporary placeholders, including a default image, the label “Team Member,” and an “Invite pending” notice.
The team member will receive an email with instructions on accepting the invite. Once they accept, the agency owner will receive an email notification and a link to Manage the Team Member. The team dashboard will be updated using the information from the team member’s Gravatar.
- Team Members have almost all of the same permissions as the Agency Owner, but they are not able to:
- Delete sites from the dashboard.
- Remove payment methods.
- Cancel or revoke licenses and plans.
- Remove other users.
- Assign licenses for WooCommerce extensions or Jetpack plugins to a site unless the agency owner is also:
- An administrator on the site itself; and
- A connected user on the site via Jetpack.
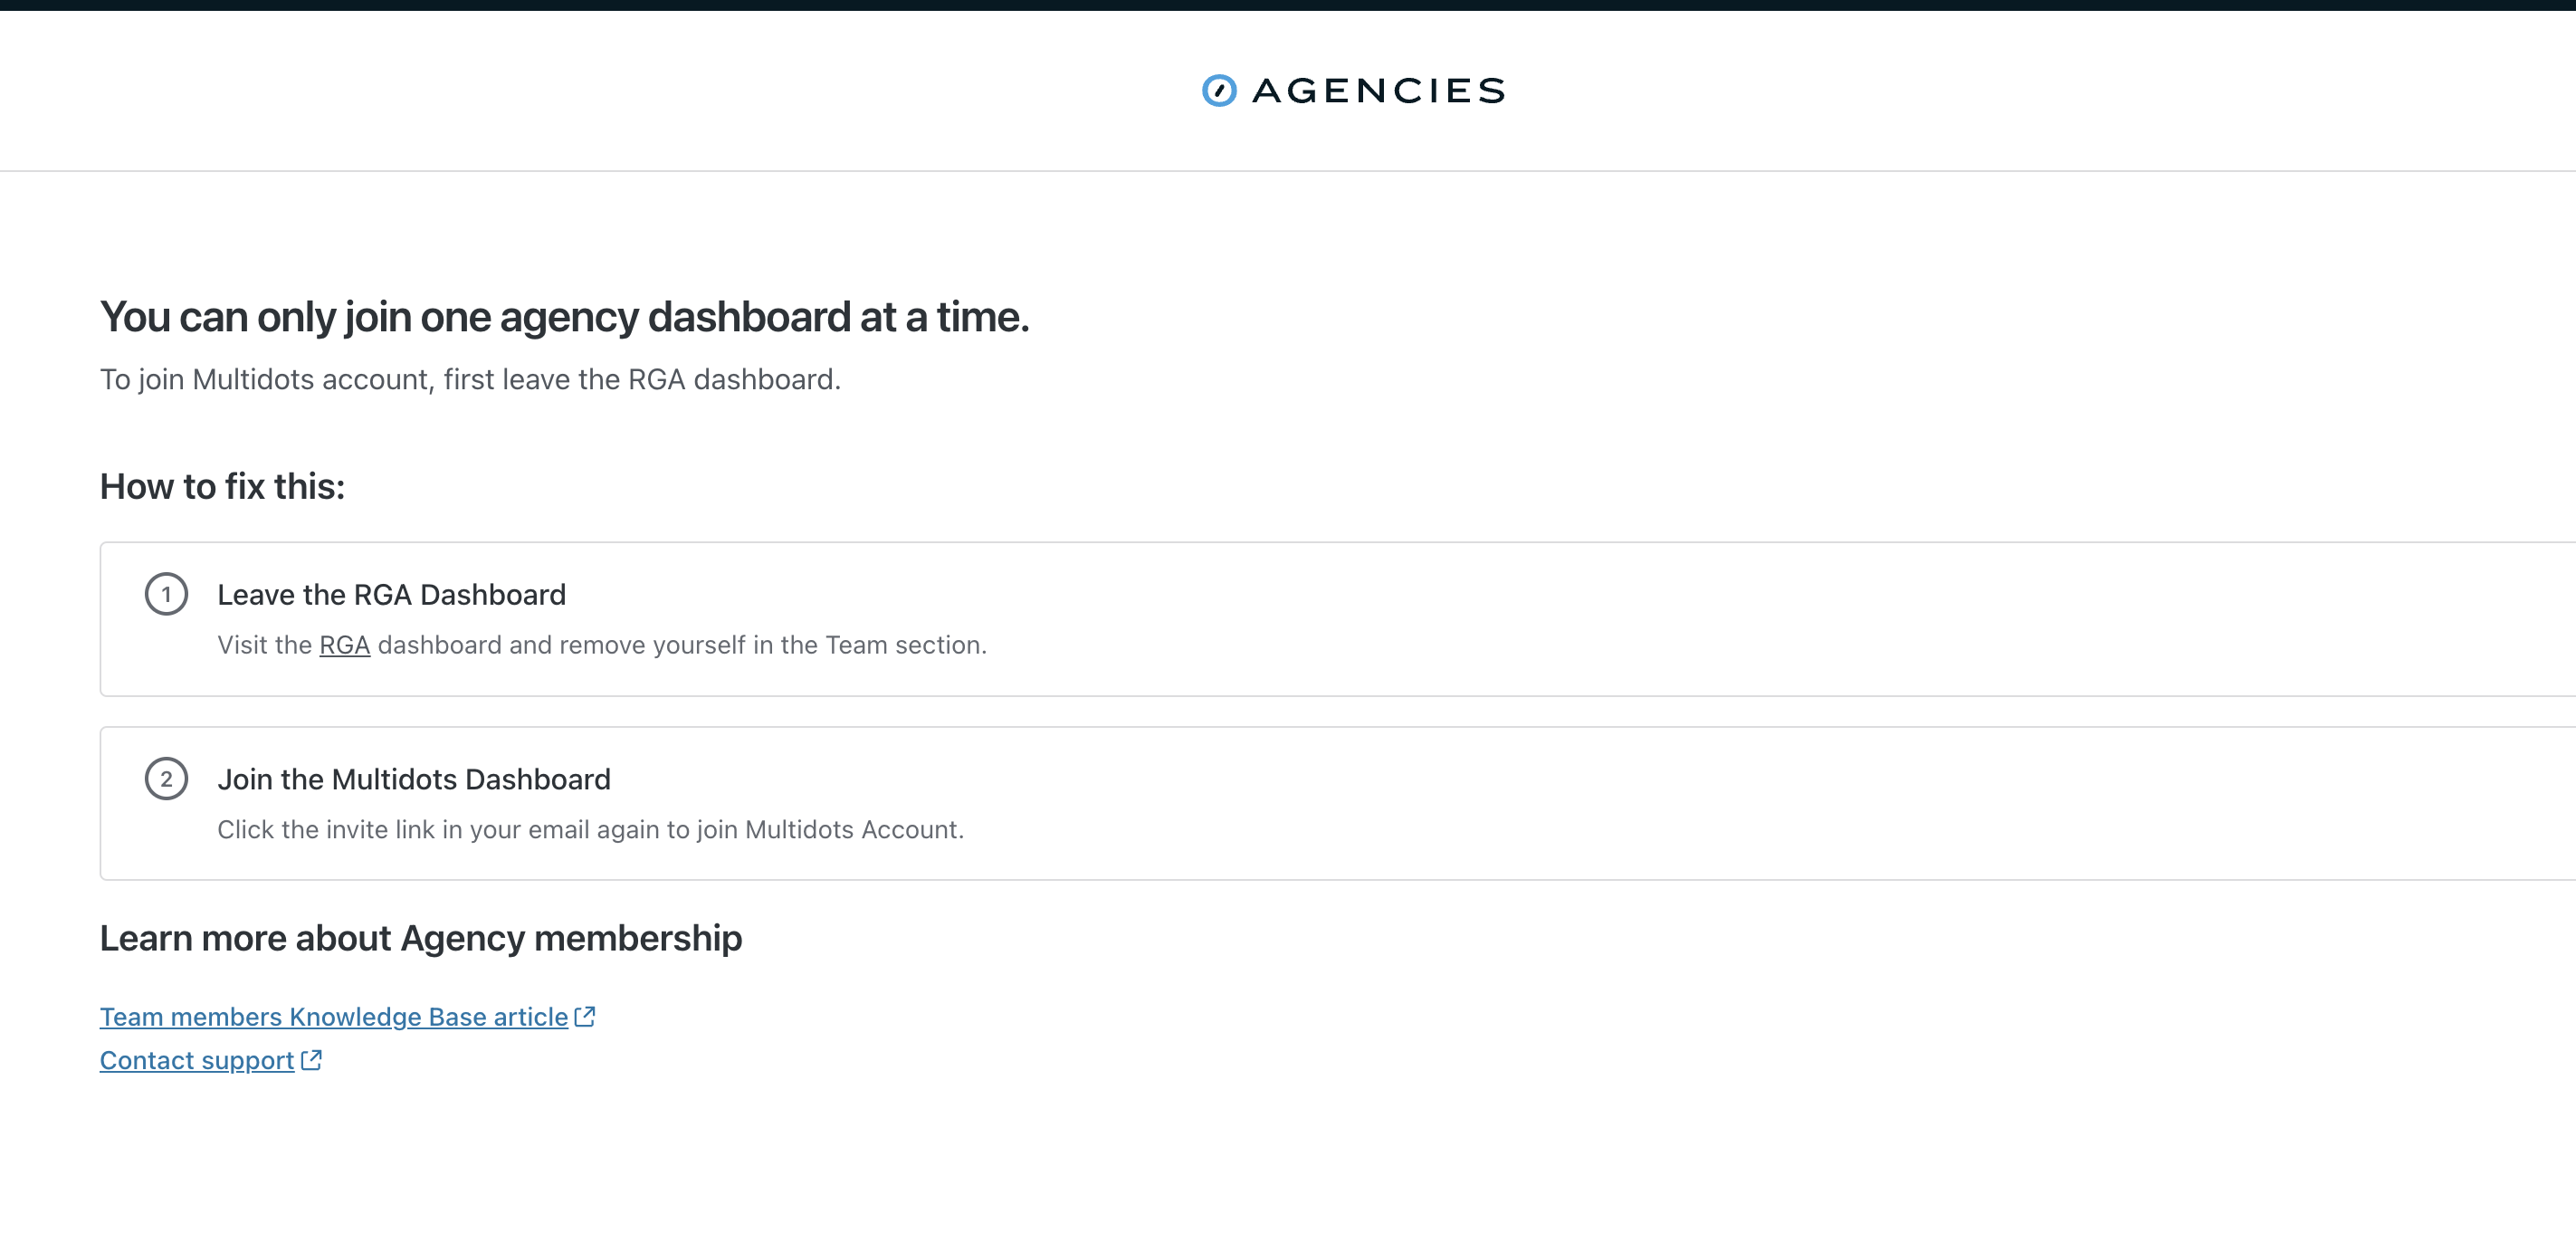
- A team member and their associated WordPress.com account can only be invited to one agency dashboard within Automattic for Agencies.
- If they are already part of an Automattic for Agencies agency, they must leave that before they can join a new agency.
A team member will not be able to assign licenses to sites unless the agency owner is also an admin user on the site itself and the agency owner’s account is also connected to the site via Jetpack. This is a security measure put in place to ensure proper use of licensing by team members.
The Team Member role is specific to the Automattic for Agencies dashboard itself. This means that once a team member accepts the invitation to an agency dashboard, they can perform actions within that dashboard.
However, this does not automatically grant them access to make direct edits to client sites or use Automattic for Agencies dashboard tools like backups even if those sites are connected to the Agency Owner’s account and displayed on the Sites Dashboard. To work on client sites, Team Members will need to be independently added to each site as a user with the Administrator role.
To grant Team Members access to specific sites managed by the Agency Owner, you will first want to make sure they’ve accepted your invitation to the Automattic for Agencies dashboard as a Team Member. You can then follow these steps depending on the type of site:
- Navigate to https://wordpress.com/people/team/
- Click “Search…” to find the site you are looking to add the new Team Member.
- Click “Add a team member”.
- Select Administrator as their role and fill in the email address of the new team member.
- “Send invitation” when ready.
- You are all done. The new Team Member now will have WP-Admin access to this site in the Automattic for Agencies dashboard.
- The agency owner should log in as an Administrator to the connected site on which they want their Team Member(s) to be able to work.
- Once logged in, navigate to the Users section of wp-admin at `yourdomain.com/wp-admin/users.php`.
- Create a new user using the same email address with which your Team Member signed up for Automattic for Agencies and ensure the ‘Send the new user an email about their account’ checkbox is checked.

- Your Team Member will receive an email about their new account on the client site.
Once your Team Member receives the login information via email, they can:
- Set their password using the link in that email.
- Log in to the client site using their new username and password.
- Go to the Installed Plugins on the site and click Automattic for Agencies Client > Settings.
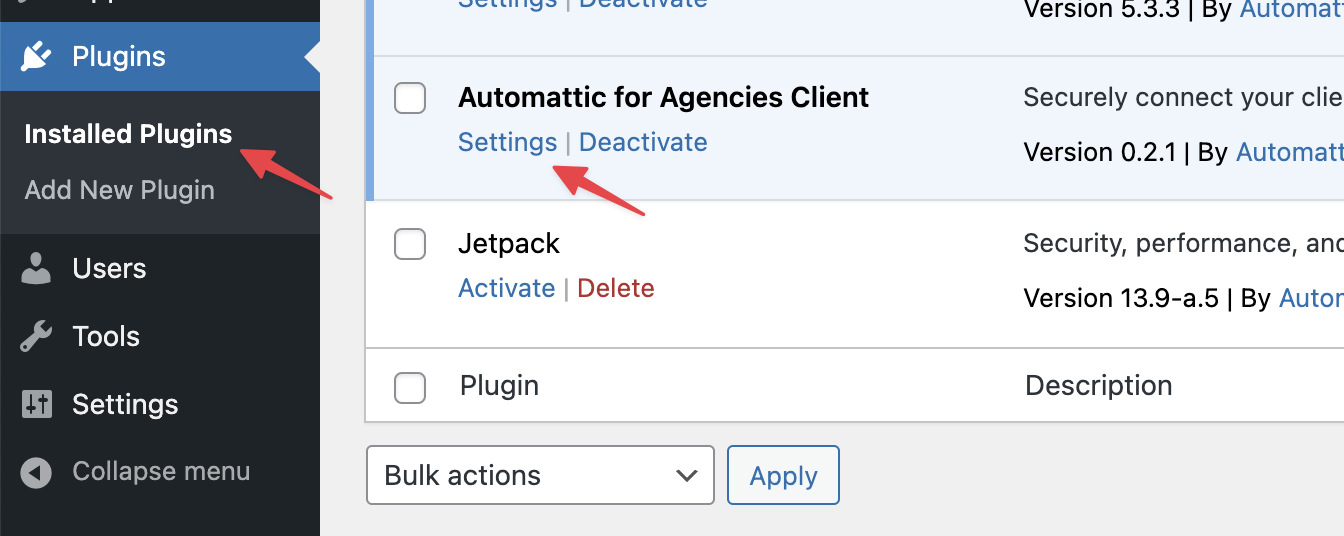
- They’ll see the Automattic for Agencies Client Plugin’s Connection page and can click ‘Connect this site’.
- If they’re logged in to their Automattic for Agencies account in the same browser, they’ll automatically be prompted to connect the site to that account by clicking ‘Approve’. Otherwise, they’ll need to log in at this point using that account.
Note: This step does not replace the already connected Agency Owner or any other Team Members who followed these steps. This is a supplemental connection used to add an additional Team Member.

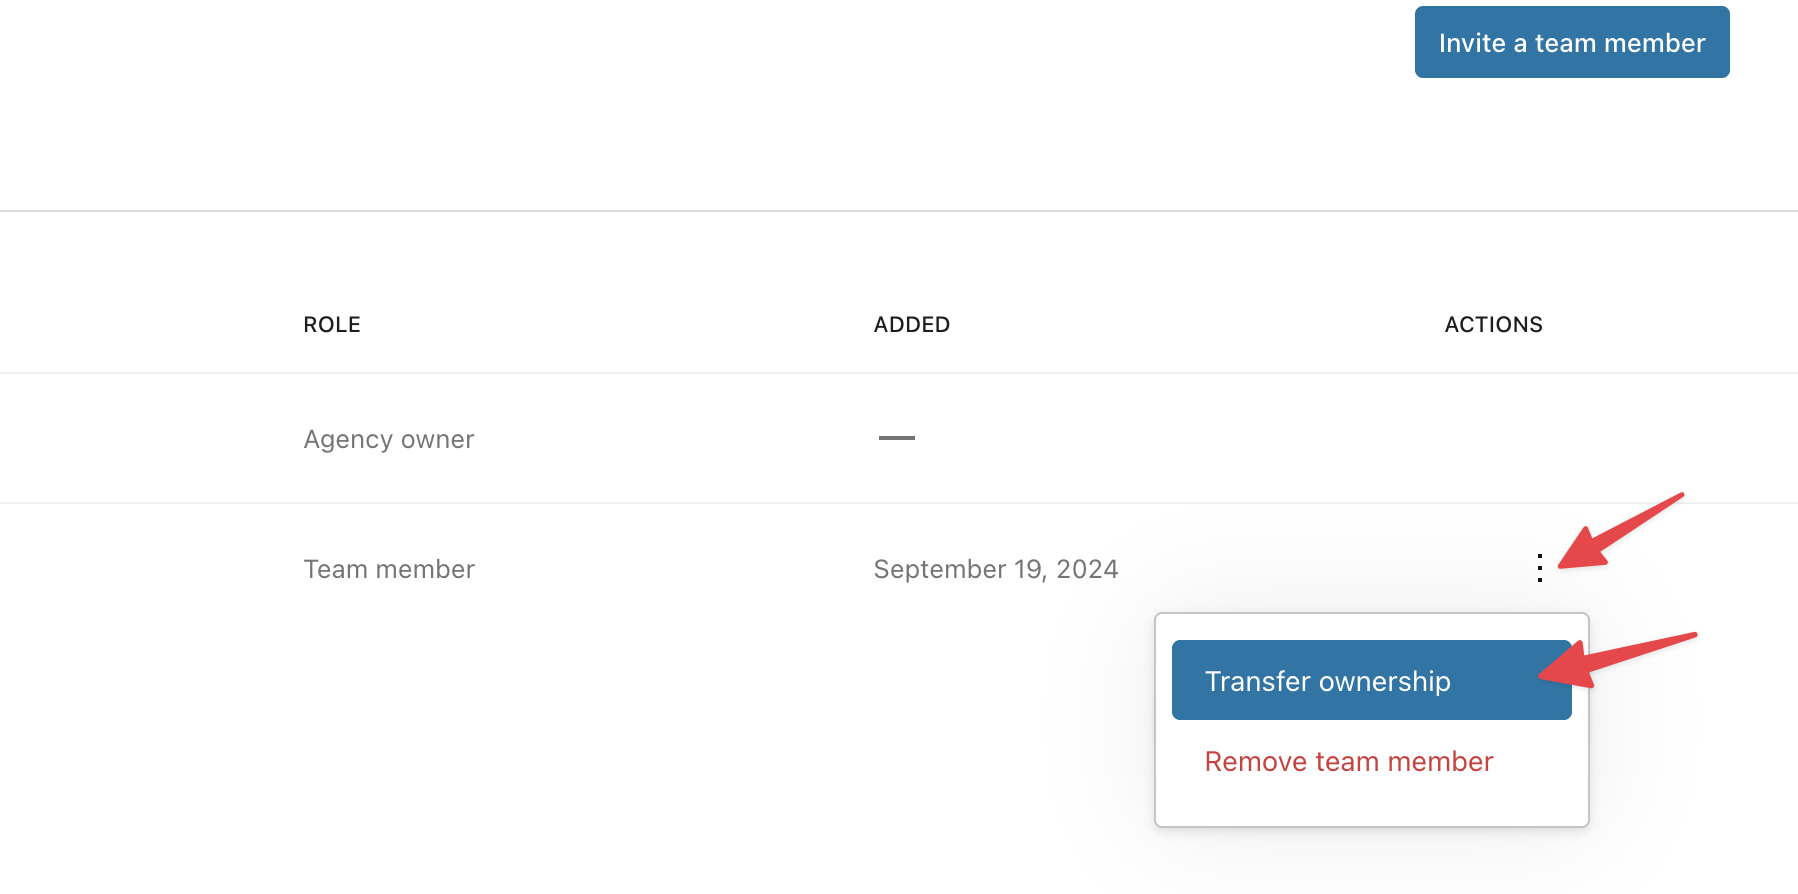
Team member options are accessible from Automattic for Agencies Dashboard > Team.
For each team member, there is a three-dot menu at the end of the row. You will see an option to remove a team member there.
If you remove a Team Member from Automattic for Agencies, it does not automatically remove them from the any client sites to which they were added. You’ll also need to manually delete them from those sites by going to each sites’ yourdomain.com/wp-admin/users.php.
Under the three-dot action menu for each team member at Automattic for Agencies Dashboard > Team, there is also an option to transfer agency ownership to that team member. This does not remove the current owner from the agency. It simply reassigns ownership to the chosen team member.
Once a new team member is added to an Automattic for Agencies agency account, they will get notified via their email address.

A Team Member can only be added to one Automattic for Agencies dashboard at a time. When a team member account is already a member of a different agency, they will be prompted to leave the previous agency first and then accept the invitation again from the new agency.
To remove a team member or your own account from an agency, go to the Automattic for Agencies dashboard, select Team, and choose the Delete User option from the three dots next to the name.
Afterward, they can click the Accept Invite button in the link to join the new agency.
We are constantly improving the roles and permissions to better serve the most common agency needs. Let us know what roles or permissions you would like to see next.
